Create Users
To create an user click on Users on the left menu. Then click on Add new User.
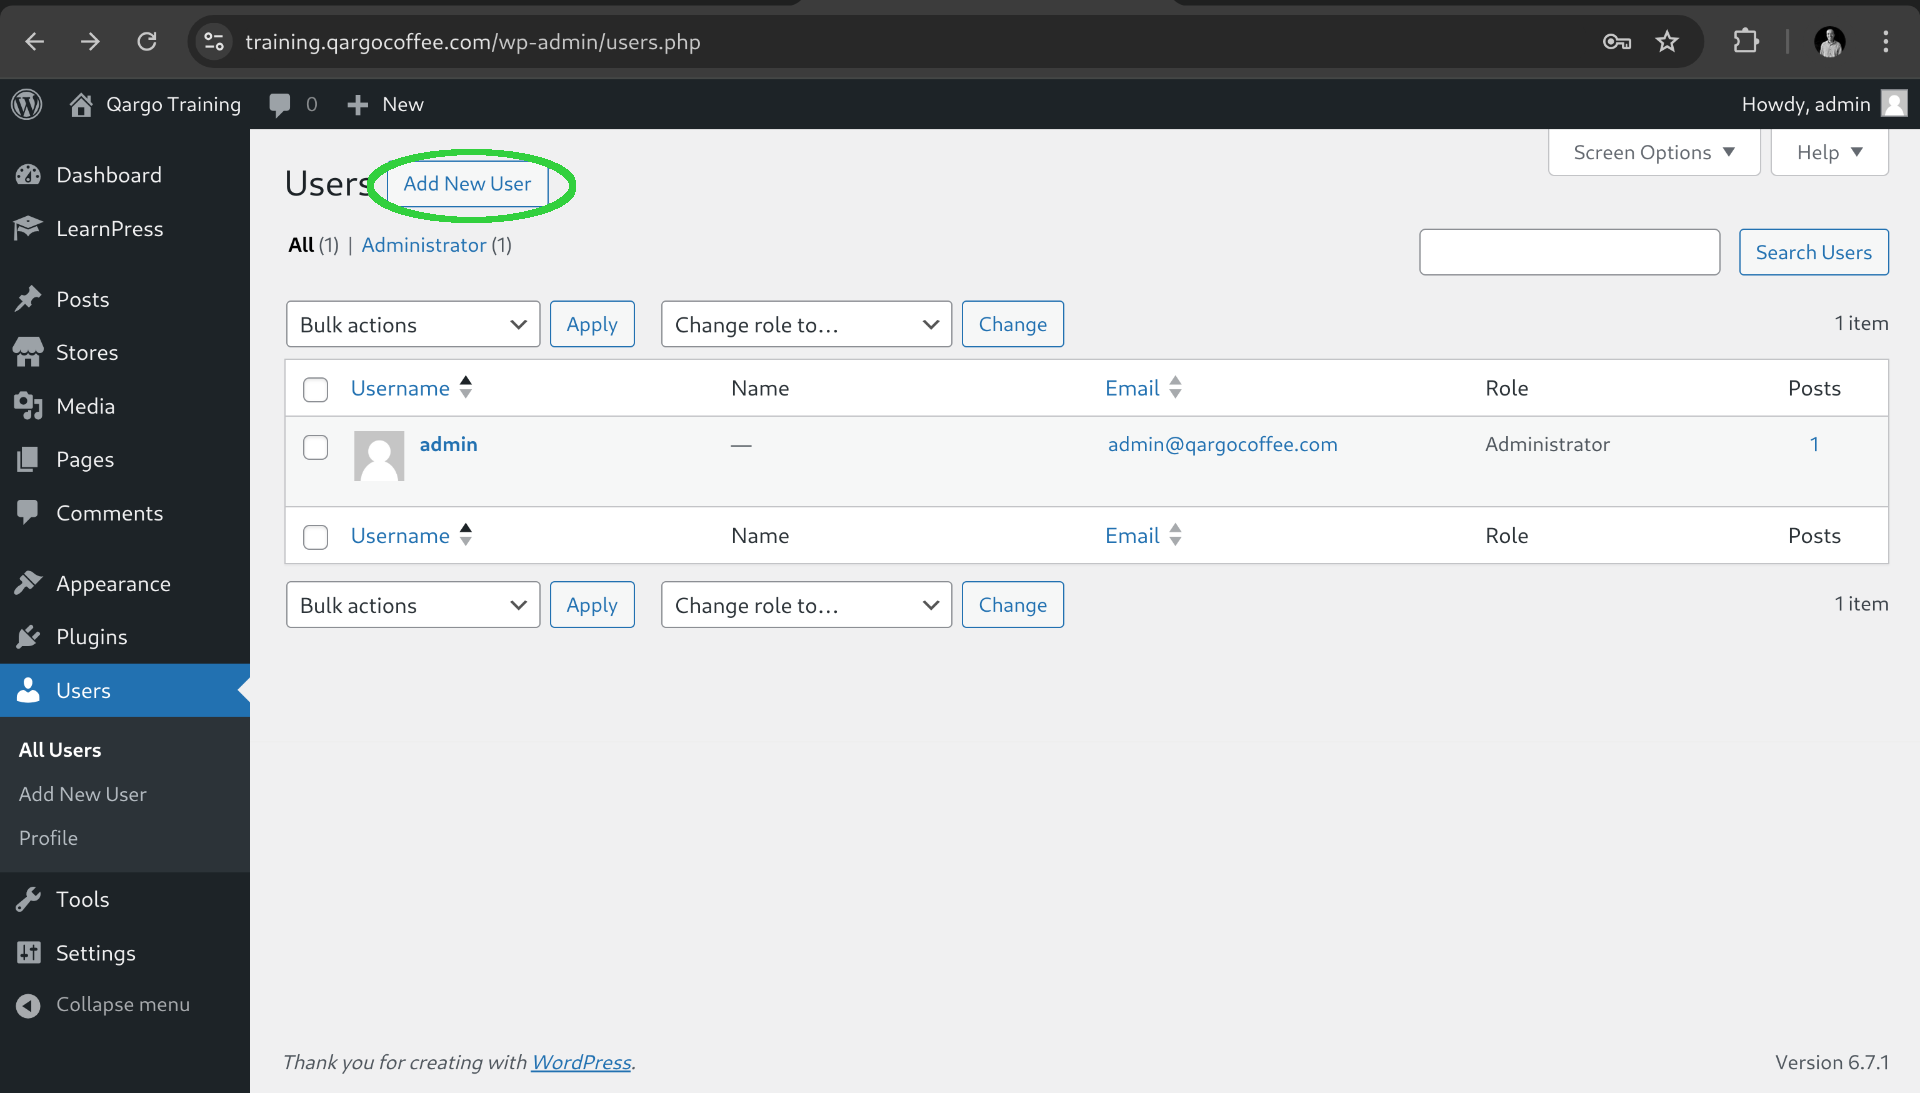
After that we need to check the yes option for users attached to a particular store.
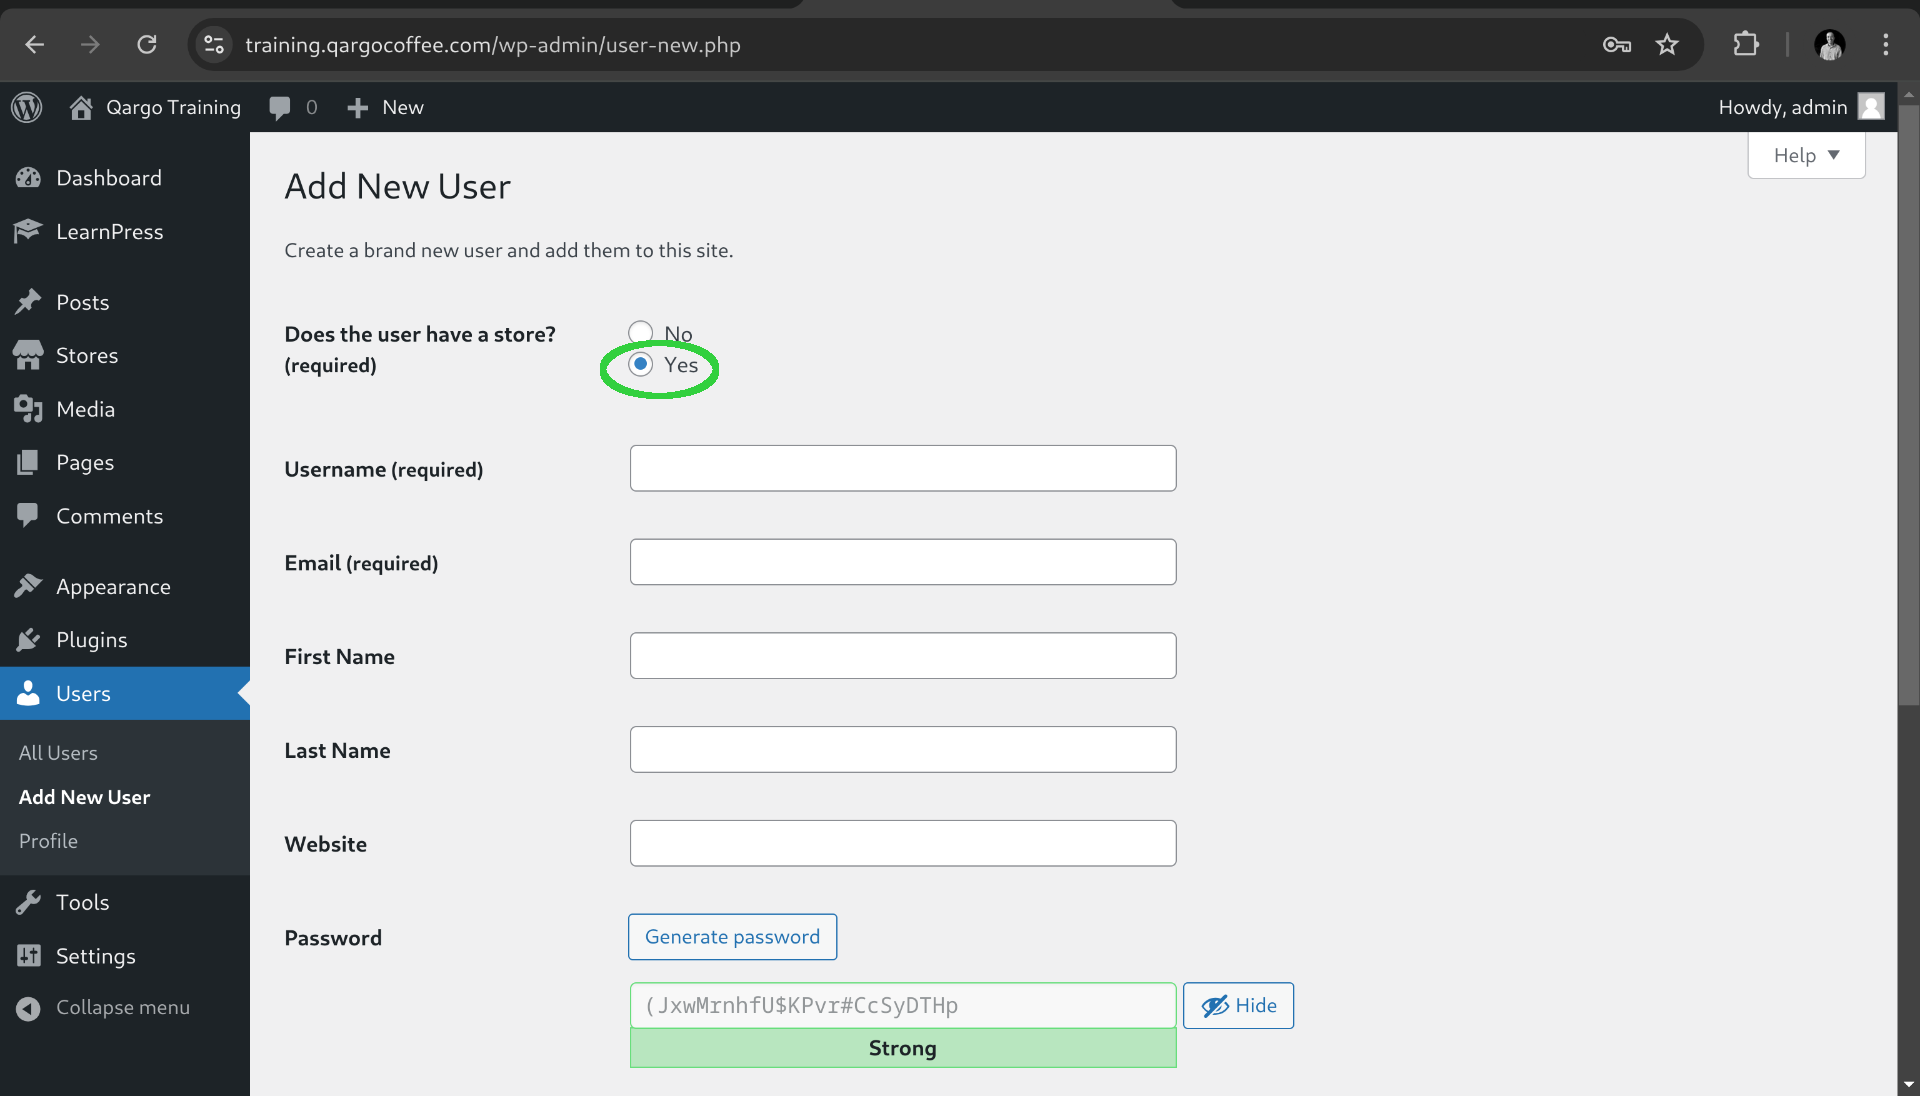
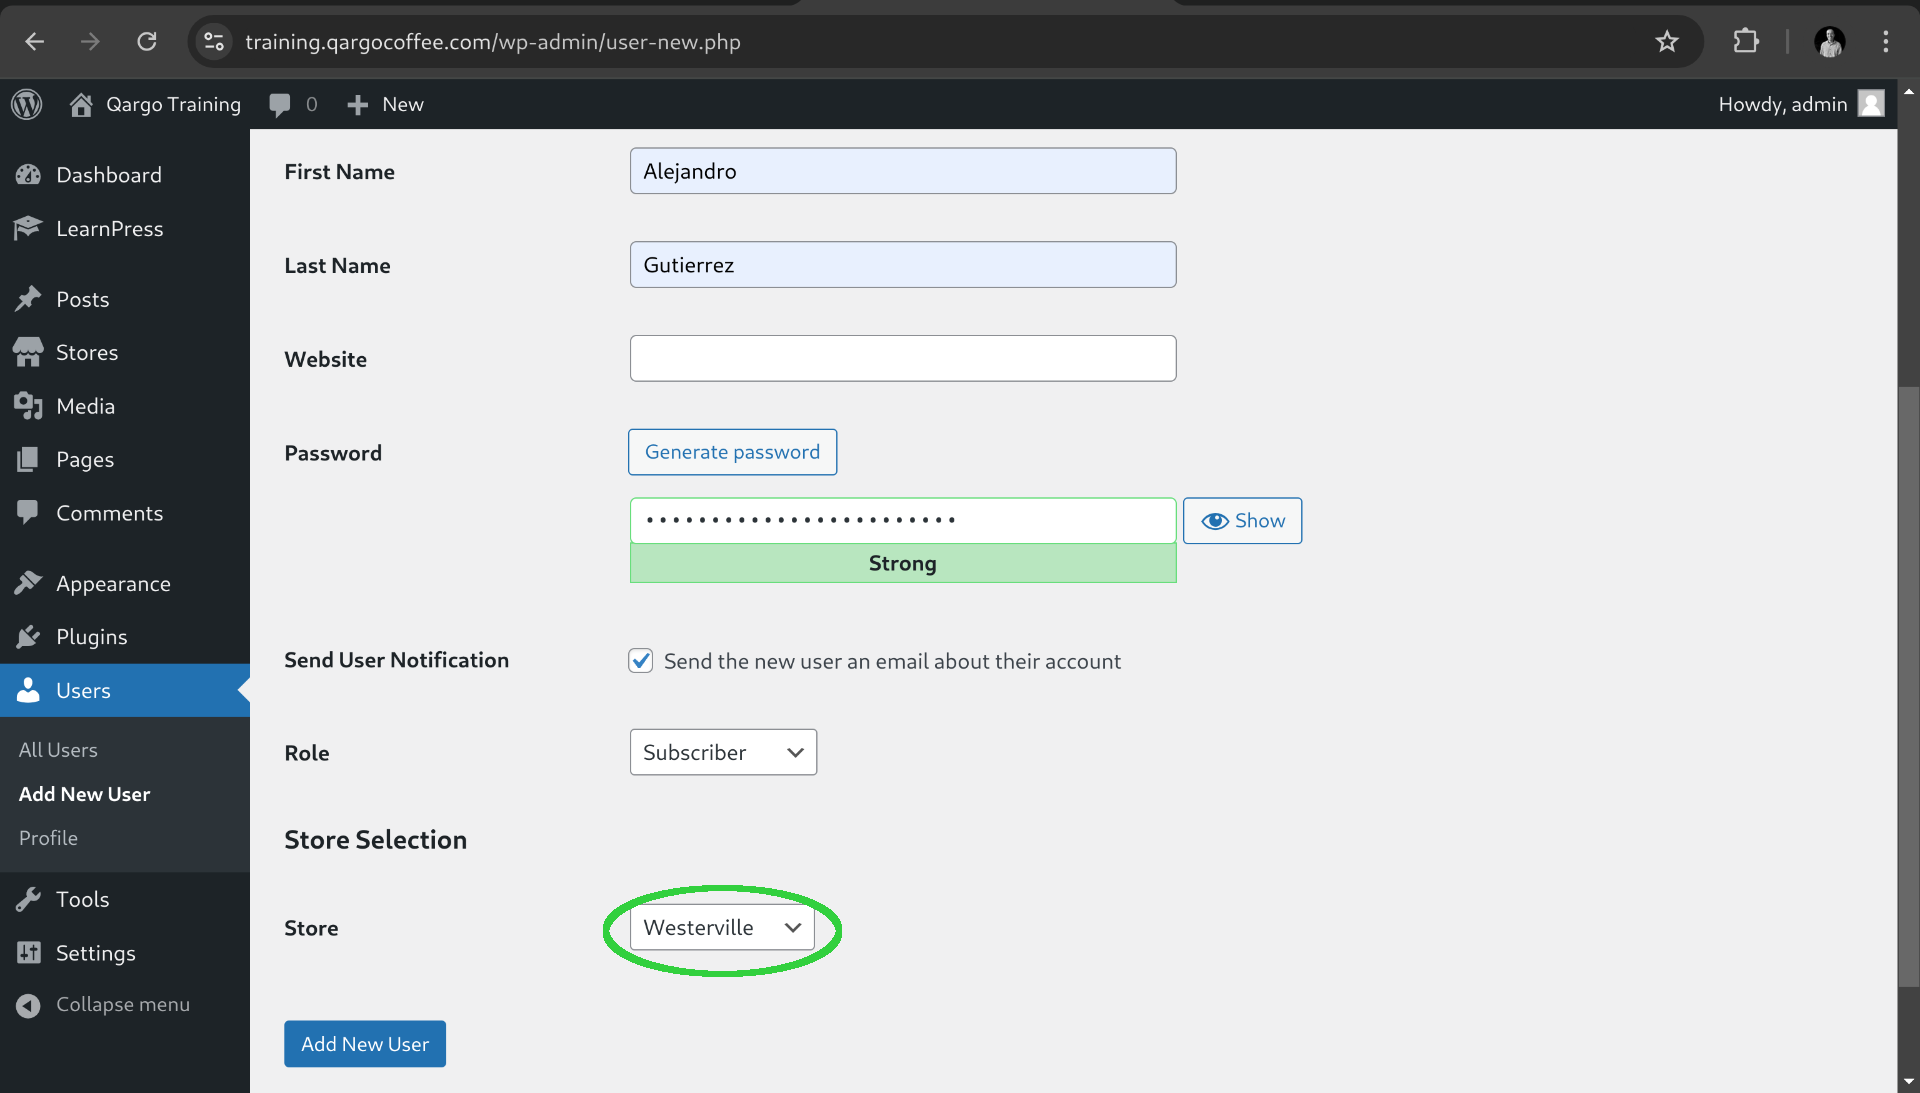
Fill the form with the corresponding information and select the store of the user.
Notice that the website field for example is not necessary. Also keep the username and password details on a safe place until the user updates the credentials.
Before creating the user make sure that everything is correct because the platform will send and automatic email with the login link to the user.
The user receives an email like the following.
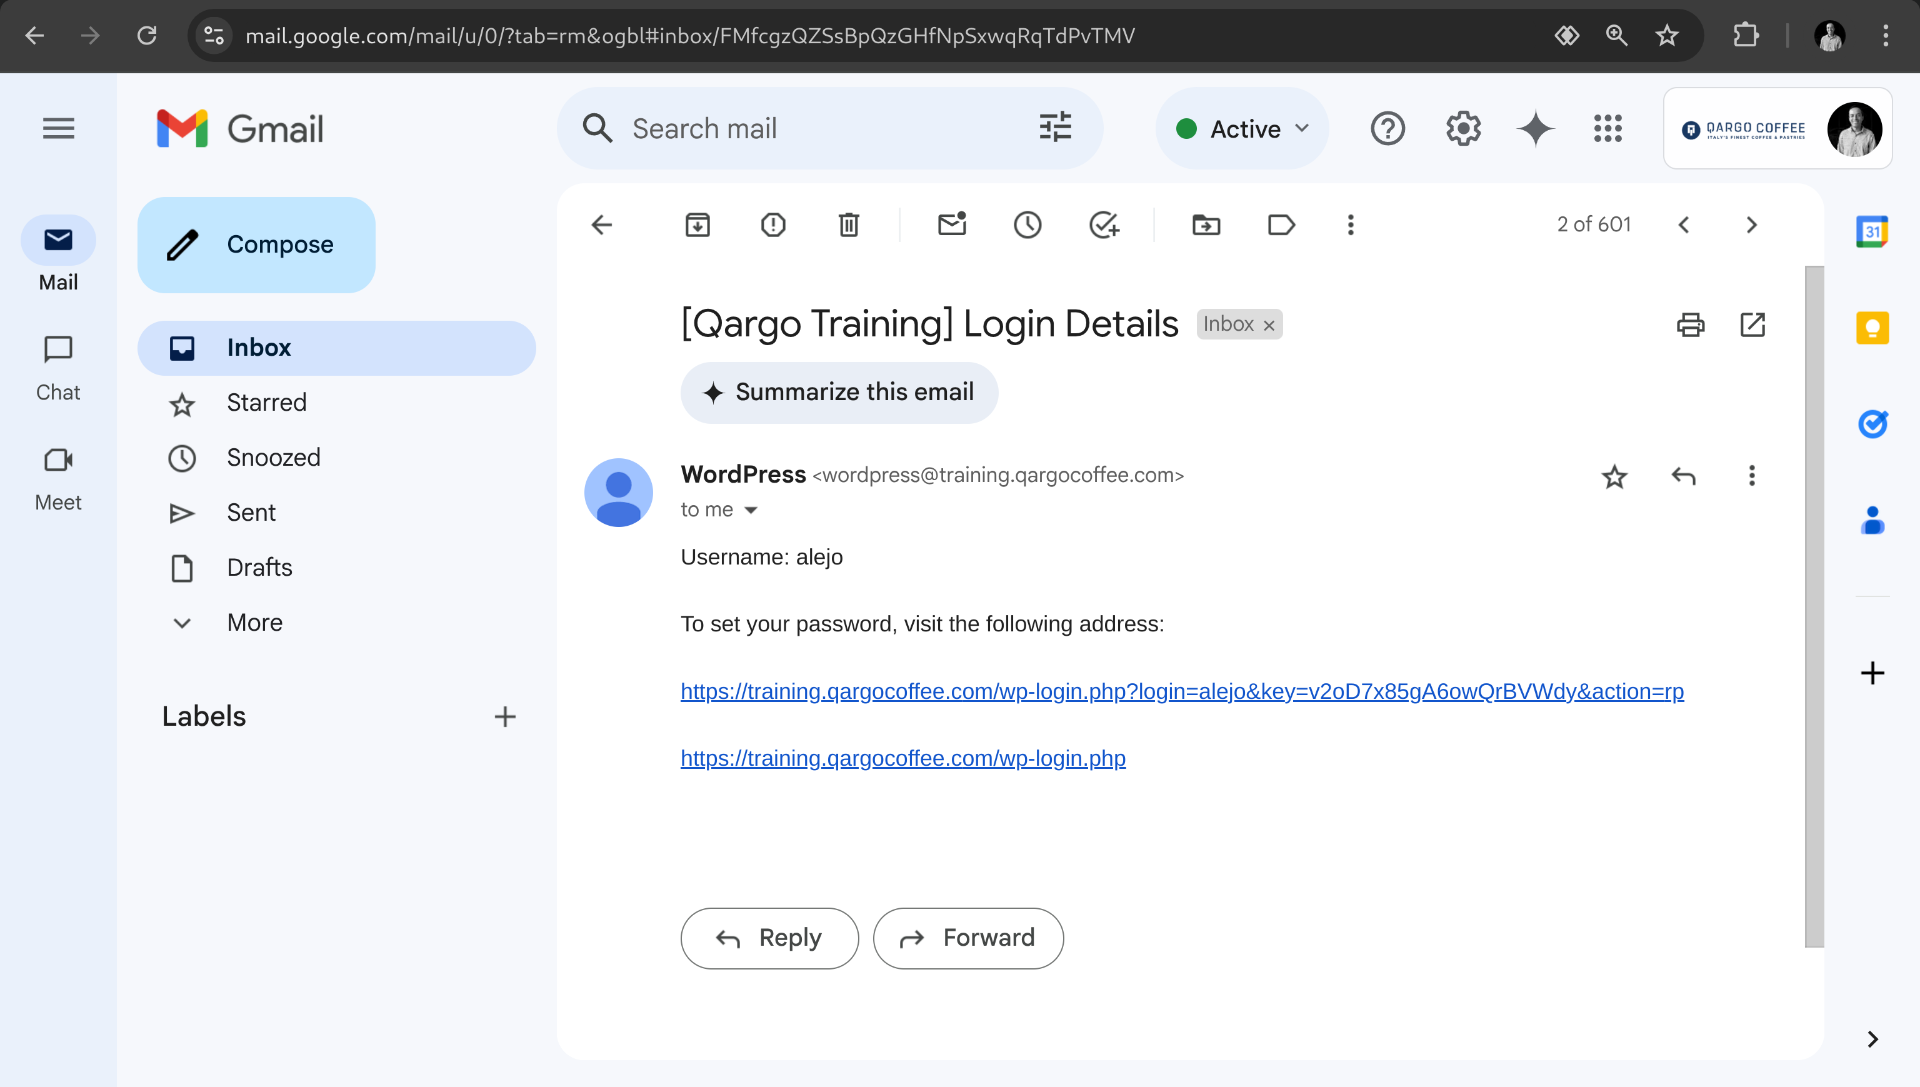
You need to know that the email has token with time expiration, so if the user is not able to access you are also able to send a password reset email from the users list.
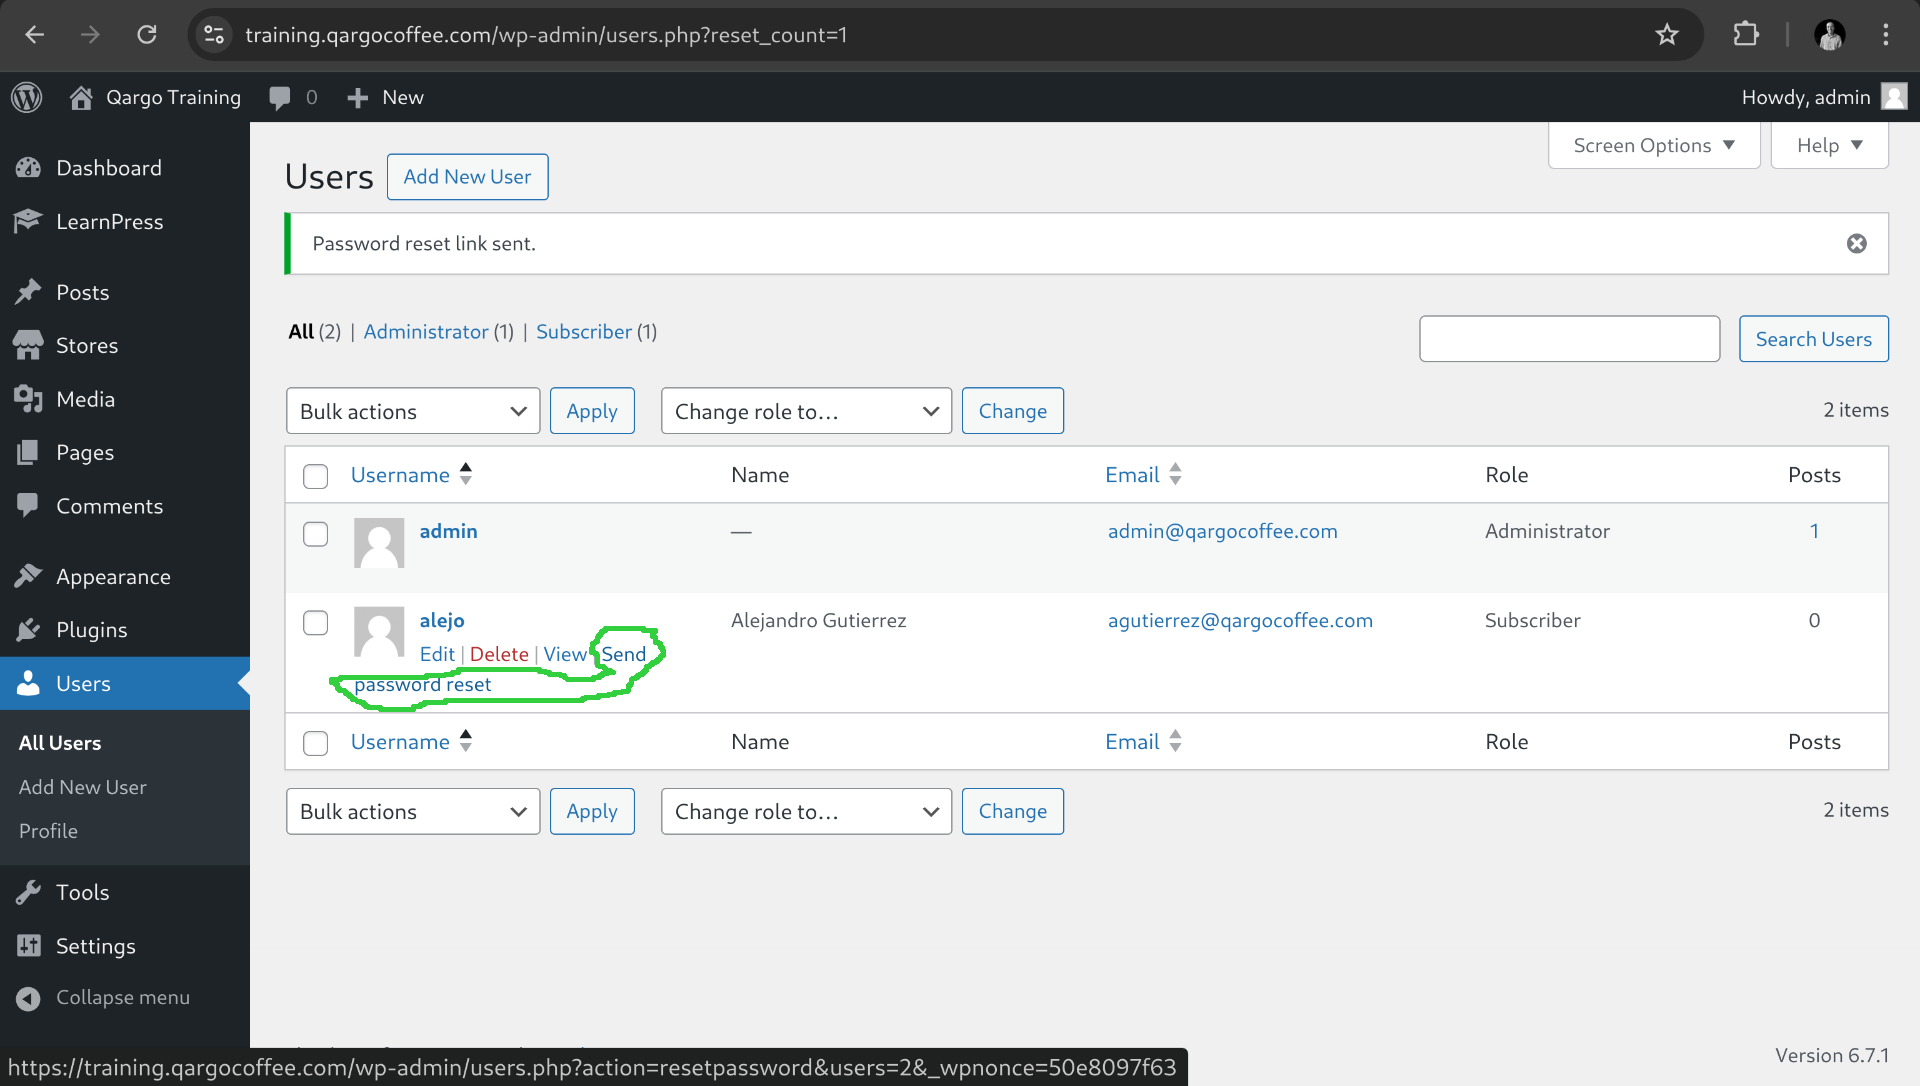
As you can see the table shows the type of role for the user so be aware of what type of users are you creating. Most of time you will need the Subscriber role for the students and administrator with only content permissions for collaborators.
That's all for this lesson.